That's right, I haven't done squat on the Spit in a few months now. I've been busting ass trying to get the inside and outside of the house finished before the weather turned cold...didn't succeed but at least I'm close.
Actually, I have done work on the Spit, aside from ordering complete brakes rebuild kits and clutch master cylinder.
The seats are completely rebuilt and recovered---total cost, less than $100.00
the interior and door panels are all finished except for the outboard footwell panels I was considering making.
All of the interior sound-proofing and insulation is done and the wood dash fascia has been sanded and refinished-though a few more coats of clear are probably needed.
I replaced the ignition switch--the $100.00+ ignition switch!!! I also replaced the starter relay. The car turns over now.
I got a rebuild kit for the carb and a new metering needle (?) You cant replace the jet in this ZS model carb, just the needle.
I had the car running before, now it just turns over. But it will run for a few seconds if you shoot starter fluid into it.
Quite frankly, I know more about nuclear thermal rocket engines than I do about British carbs.
soooooo......
I emailed Butch, my British car shop owner friend out in Burlington to see if he can do the engine and carb tuning work for me. I'll have to trailer the car out to him but it's worth the time and effort. I'm going to finish up rebuilding all of the braking systems so when the car comes back (barring any major surprises) I can start on the paint and boy work. The Spit will be on the road come spring though that will be about 8 months behind schedule.
then I can get my ass in high gear and get the MGB restoration finished.
God, I hate working on cars in the cold.
I'll keep y'all posted.
Happy holidays

December 13, 2010
September 2, 2010
9-1-2010 to 9-2-2010
9-1-2010
Got most of the firewall and the engine compartment shelf cleaned up and painted. Some of it’s not perfect but it will do.
I pulled the battery out and cleaned out the battery box. There was a good amount of surface rust and one small rust hole. I wire brushed it all, sprayed a few light coats of rust converter and, when that was dried, primered and painted the whole area.
I took a few grades of steel wool to the wheels and then painted them with the parts store silver paint for wheels…meh.
I whipped out my new laser guided saber saw (jig saw to some) and cut out new door panels. After a bunch of trial fitting I think I got them about right. I also got the seat frames all cleaned up. I wire-brushed them, sprayed rust converter on them and then put down a few layers of gloss black paint. I can see now why the driver side floorboard was so rotted out. The car was apparently getting rained in for quite a while from a bad top leak or some other pathway for water. It must have been so bad, in fact, that the seat frame itself was rusted and the outboard tubing snapped in half. It has another piece of tubing shoved inside of it as a repair but this is just one more thing the owner neglected to point out to me
9-2-2010
The engine bay firewall and firewall shelf are all cleaned and repainted and all the stuff on it is reattached. Looks…well…not too bad.
I pulled the front right wheel off and cleaned and painted the hub and caliper. Found out, of course, I need brake pads for the front. I can only assume I need shoes for the rear but hopefully not.
Started working on the interior panels and seats. I got the door panels cut out. I also put down a layer of foam and then the checkerboard carbon-fiber-looking pattern material that my Wifey picked out. It looks really cool. I have to get the rear cockpit shelf built and a new rear bulkhead/fuel tank cover panel built before I make the rear quarter panels. Though they were originally covered with carpet, I think I’m going to make the front footwell kick panels and use those to mount the speakers.
As for a sound system, I just might go ahead and mount that AM/FM/CD player that I got when I bought the lot of MGB parts this spring. I already have speakers which I‘ll be “borrowing” from the MG restoration.
I got one seat rebuilt and recovered. I reused the base foam since I’m not paying $100 for a hunk of foam. I cleaned and painted the seat frames a few days ago. I then cleaned the foam and re-glued the parts together that make up the base. I then cut out a 1” thick piece of dense foam and glued it to the flat, square area in the center of the base. I glued down a layer of ½“ foam that I salvaged from an old mattress and the foam looked and felt pretty good.
I saved the rubber straps from the seat back. They were just a bit stretched so I crossed them when I hooked them up so they formed an x-pattern. Worked well and prevented me from having to buy more stuff.
I then took a big hunk of 3” thick from a that I saved from an old bunk bed mattress and cut out two pieces a bit bigger than the seat back. I wrapped the rear horizontal bar in the seat back frame with foam and then cut out and taped some cardboard from a Priority mailing box to the seat back frame. I cut out some angled pieces of foam to give the seat back surfaces some shape and then glued them to the front of foam which I then cut to the final shape of the seat back frame and curled the edges of the foam to the frame. If you’ve ever recovered an MBG seat then you are familiar with what I’m talking about here.
I then took a seat cover from an auto parts store, separated the top from the bottom halves and then glued and sewed the covers to the seat base and seat back.
I also pulled the headrest apart, cleaned out the original foam which had crumbled to a disgusting dust and then installed new foam and recovered it.
Helpful tip---use an electric carving knife if you are going to carve your own foam. It cuts through it like butter and makes shaping and carving the foam really easy.
The seat covers I used are a cloth material and I used them because they are cheap and because they are just going to be a sort of base. I also have a set of black vinyl covers which will fit over top of the seats.
I never realized just how small these seats are until I finished one and sat in it…it feels like a baby seat to me. It even looks small when my 11-year old step-son sits in it.
I’m going to pull the rest of the wheels off tonight and check the condition of the remainder of the braking system and then cleaning and painting it all. While I’m at it I’ll be giving the center caps to Kevin since he has a sand blasting cabinet. I’m also going to finish replacing the plug wires, distributor and (if I really feel like it) the radiator hoses.
Oh, the most important thing: I bought a chrome tailpipe extension with a square tip to cover the really ugly tailpipe…should add about 40 extra horsepower! J


August 31, 2010
6-13-2010 to 8-30-2010
6-13-2010
I finished the driver’s side and passenger side floorboards and side footwells except for a coat of paint on the passenger side footwells.
The rust has been replaced with metal and fiberglass, the insides and outsides of the panels have been coated with truck bed liner and paint and the underside of the floorboard repairs have two coats of truck bed liner and three coats of spray-on rubberized undercoating.
I put down the foil aluminum butyl sound-deadening material on the drivers side and part of the passenger side floorboards and transmission tunnel. I ran out so I went to pick up another roll of the material at Home Depot. While I was there I got the foil tape to seal the edges and I looked for the mylar bubble wrap-like thermal insulation but they don’t have that anymore. I’ll just pick up some dashboard folding sunscreens since they are made out of the same material…a bit more expensive that way but not too bad.
Tonight’s to do list:
1. Clean up carb for rebuild and maybe start the rebuild.
2. Finish laying butyl layer on floorboards and seal with foil tape.
3. Place layer of butyl on inner door skins
4. Glue down thermal insulation.
5. Finish the laundry and clean the kitchen…not car related but I still have to do it.
7-16-2010
First things first---I got the kitchen cleaned.
Well the vibration dampening insulation is all laid down in the cockpit., I also found the mylar bubble insulation roll at a Lowes Home Improvement store for about $15.00 so I got that, a can of contact adhesive and a few el-cheepo paint brushes and then installed the Mylar thermal insulation. I still have to put some of the butyl anti-vibration mat inside the doors so they’re a bit more solid plus sand down the wood dash and refinish it but the cockpit is mostly done. I still have to cut and install the carpet and make and install interior panels and sound system but that doesn’t happen until the car is painted.
The carb is off and I should have the rebuild done in a day or two. I’m not sure how far I’ll goon the rebuild but at the very least it’s getting new seals, float valve, etc. If I can avoid replacing the needle and jet I’ll be very happy…but I’m not hopeful.
I need to get the thing running soon---for many reasons. The underside has a lovely sheen of leaked oil and I’d like to get it all pressure washed off so I can trace the leak and take care of it. Plus, I want to drive the thing before the summer is over.
7-26-2010 IT’S ALIVE!!!!!!
Got the carb rebuilt and put back on the car. Once I got a battery that would actually hold a charge the Spit started up with only about 6 seconds of cranking.
I replaced the spark plugs and shot a small amount of oil into the cylinders but once it started the engine idled with no stumbling or sputtering which is very good news.
In the not-so-good-news department, if you push on the gas pedal there is almost no noticeable difference in the rpm’s. I think it’s a vacuum issue but since know nothing about Zenith Stromberg cars it could just as easily be a chipmunk stuck in the fuel filter.
When I lift up the piston in the carb with a screwdriver the rpm’s increase very smoothly but then the piston doesn’t drop back down like it’s supposed to so the rpm’s stay just where they are…a nice little form of cruise control but not exactly how it’s supposed to work.
I’ll figure it out or somebody who actually knows what they’re doing will (much more likely) I’m just glad the thing is running. I bought a new battery so the only big things left for me to buy are the tires, painting supplies and (possibly) a clutch master cylinder.
I could possibly have the car on the road within 2 weeks…here’s hoping it’s close since July is almost over and I only have about 3 months before the weather turns too shitty to drive the thing.
8-20-2010
I haven’t made an entry in a while (because I’m slack…remember? We covered that already.)
I’m getting closer to actually getting stuff done on the Spit
First, and most importantly, I’ve come up with a knick-name for the car---the Shitfire! Yup, I like it!

Anyway, I got the cockpit thermal insulation and butyl foil anti-vibration insulation install finished. Just about every square inch of the cockpit interior is thermally and acoustically sealed. The only area I didn’t do heavily is the rear shelf behind the seats but I’m building a shelf for speakers and an amp in that area anyway.
I also put the butyl anti-vibration material all over the cardboard transmission tunnel and, since the part of the tunnel that meets the firewall was rotting away, I used the butyl foil material to seal it to the firewall. That was a better fix than the previous owner’s repair attempt which consisted of wads of duct tape that has since hardened and fallen apart.
I also applied a layer of the butyl material on the inside of both doorskins which give the doors a much more satisfying and sold “thud” when the doors are closed. I’m also going to seal the inside of the doors with plastic sheet and then a layer of roofing felt paper before I put on the new door panels.
I got some basic cleaning and painting done on the front suspension-it’s not going to win any shows, but it’s clean and covered. I also wire-brushed cleaned and primered the top of the cowl and I’m moving down onto the rest of the firewall. Lots of rust to clean up around the hydraulics masters since years of fluid leakage ate away the paint and left it unprotected.
My next work (aside from getting Kevin over here to see if we can get the carb squared away) will be making the rear sound system shelf and the engine bay valances. The rear shelf will be a basic insulated wooden box with black carpet over it and it will hold the speakers and either an audio amp or a storage compartment. The engine valances will be made (probably) out of sheet aluminum. The Shit still has the driver’s side one though it is looking pretty rough. The passenger side valance is basically gone. I’m not sure if you really need them but there gonna be in there regardless.
I’ve almost completed the modifications for the chrome bumper conversion. I’ve nearly all of the metal cut off from front end so the bumper will fit. All I have to do is finish making the over-riders, cleaning up and painting the area and making and installing new front brackets. I also have to pick up the spoiler from a guy in High Point.


July 12, 2010
6-29-2010 to 7-12-2010
6-29-2010
I found out something very interesting today. The truck bed liner I applied to the cleaned up floorboards had finished drying and I was spraying paint on them from a rattle can. Not only was the Walmart spray paint on sale and covering well, the fumes were sufficient to stun the many, many wasps that flew out from their nests up under the dashboard. This allowed me escape from the garage , running like the little girl we all become when attacked by stinging insects.
Bug bomb time.
I picked up the checkerboard fabric that wife picked to cover the interior panels with. It is a sort of black on black checkerboard where you see the little squares more as texture differences than color differences. I picked up the masonite for the panel backing last week so all I need is some spray adhesive and thin foam rubber for the backing and I can get all the interior panels made.
7-12-2010
Got back to work on the Spit after my great Ohio trip with my 9-year old son. I really got serious last night and got the entire driver side floorboard and kick panel rust outs repaired. I had already torn out the “repairs” made by the DPO and cut out the rusted metal from the floorboards. After wire brushing, grinding, cleaning and coating the area with rust converter, I then took some sheet metal and cut out the appropriate-sized patches, hammering the curves into some of them with a good old fashioned hammer and block.
The rust in the outer and inner sills was worse than I thought so I took a bit more time to be sure to get as much of it out as possible. I coated everything with rust converter, actually pouring it into the rockers to make sure everything got hit with it.
I then put the patches in place and riveted them in position and then out came the mig welder. I have never welded but I must say that after I was all done, I pretty much concluded that I am a really shitty welder! But it worked so no biggie.
After everything was welded in place and the welding slag cleaned off, I laid down the first layer of fiberglass and resin on the floorboards. I also covered the new replacement metal on the rotted section of the outside footwell. Then I went to bed after a very long shower.
This morning, I laid down the second and final layer of fiberglass and shot a few coats of truck bed liner over it. I also got up under the car and shot a few layers of truck bed liner on the underside as well. I’ll follow that up with a few coats of rubberized undercoating on the underside and a few coats of paint on the topside.
I’ll do the same basic procedure on the passenger footwell that is rotted out and then the major
  rust-repair will be done.
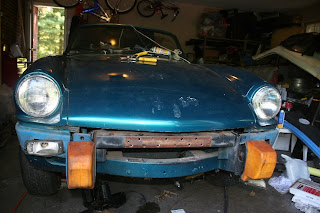
I pulled off the gigantic rubber front and rear bumpers for the chrome bumper conversion. My friend Kevin found me some old GT6 bumpers for $50.00 even if there is no chrome on them at all, they’re worth the price. I’ll see if they have over riders, if not, I cut off the integrated ones from my old rubber bumper and I’ll see if I can make something out of that.
The rear swap looks like it’s fairly straightforward and I’m told it is. The front swap, however, looks like it will be a bitch! I pulled off the foam energy-absorbing blocks and then drilled out the welds on the center support bracket…that was a bitch. Once I got that off I took out my Porter Cable sawz-all and cut the welds on the two angle brackets under the center bracket.
It looks like I’m going to have to cut off most of the over-rider support structures to fit a chrome front bumper. I can’t cut all of it off (the seemingly easy approach) since the hood pivot assembly is inside those huge hunks of metal. This should be interesting.
Now that the majority of the rust repair is done, tonight I’m going to put down a layer of dyna-mat vibration insulation throughout the cockpit then a layer of the mylar bubble-wrap-type thermal insulation. I bought a roll of black carpet to re-carpet the interior. All of the interior panels need redone and I have the materials for it but I just may wait for wifey to get back from Alaska so she can have some fun too.
On the to-do list tonight is replacing the cap, rotor, plugs and wires. I’m also going to pull the carb off tonight and finally attempt a rebuild. With any luck the Spit should be running by the end of the week…but it’s more likely that I’ll be bitching and moaning and having to find somebody who actually knows what they’re doing to help me.
I found out something very interesting today. The truck bed liner I applied to the cleaned up floorboards had finished drying and I was spraying paint on them from a rattle can. Not only was the Walmart spray paint on sale and covering well, the fumes were sufficient to stun the many, many wasps that flew out from their nests up under the dashboard. This allowed me escape from the garage , running like the little girl we all become when attacked by stinging insects.
Bug bomb time.
I picked up the checkerboard fabric that wife picked to cover the interior panels with. It is a sort of black on black checkerboard where you see the little squares more as texture differences than color differences. I picked up the masonite for the panel backing last week so all I need is some spray adhesive and thin foam rubber for the backing and I can get all the interior panels made.
7-12-2010
Got back to work on the Spit after my great Ohio trip with my 9-year old son. I really got serious
 last night and got the entire driver side floorboard and kick panel rust outs repaired. I had already torn out the “repairs” made by the DPO and cut out the rusted metal from the floorboards. After wire brushing, grinding, cleaning and coating the area with rust converter, I then took some sheet metal and cut out the appropriate-sized patches, hammering the curves into some of them with a good old fashioned hammer and block.
The rust in the outer and inner sills was worse than I thought so I took a bit more time to be sure to get as much of it out as possible. I coated everything with rust converter, actually pouring it into the rockers to make sure everything got hit with it.

I then put the patches in place and riveted them in position and then out came the mig welder. I have never welded but I must say that after I was all done, I pretty much concluded that I am a really shitty welder! But it worked so no biggie.
After everything was welded in place and the welding slag cleaned off, I laid down the first layer of fiberglass and resin on the floorboards. I also covered the new replacement metal on the rotted section of the outside footwell. Then I went to bed after a very long shower.
This morning, I laid down the second and final layer of fiberglass and shot a few coats of truck bed liner over it. I also got up under the car and shot a few layers of truck bed liner on the underside as well. I’ll follow that up with a few coats of rubberized undercoating on the underside and a few coats of paint on the topside.
I’ll do
 the same basic procedure on the passenger footwell that is rotted out and then the major
  rust-repair will be done.
I pulled off the gigantic rubber front and rear bumpers for the chrome bumper conversion. My friend Kevin found me some old GT6 bumpers for $50.00 even if there is no chrome on them at all, they’re worth the price. I’ll see if they have over riders, if not, I cut off the integrated ones from my old rubber bumper and I’ll see if I can make something out of that.

The rear swap looks like it’s fairly straightforward and I’m told it is. The front swap, however, looks like it will be a bitch! I pulled off the foam energy-absorbing blocks and then drilled out the welds on the center support bracket…that was a bitch. Once I got that off I took out my Porter Cable sawz-all and cut the welds on the two angle brackets under the center bracket.
It looks like I’m going to have to cut off most of the over-rider support structures to fit a chrome front bumper. I can’t cut all of it off (the seemingly easy approach) since the hood pivot assembly is inside those huge hunks of metal. This should be interesting.
Now that the majority of the rust repair is done, tonight I’m going to put down a layer of dyna-mat vibration insulation throughout the cockpit then a layer of the mylar bubble-wrap-type thermal insulation. I bought a roll of black carpet to re-carpet the interior. All of the interior panels need redone and I have the materials for it but I just may wait for wifey to get back from Alaska so she can have some fun too.
On the to-do list tonight is replacing the cap, rotor, plugs and wires. I’m also going to pull the carb off tonight and finally attempt a rebuild. With any luck the Spit should be running by the end of the week…but it’s more likely that I’ll be bitching and moaning and having to find somebody who actually knows what they’re doing to help me.
June 28, 2010
6-25-2010
I got the garage “cleaned” out and the Spit pulled up in. My lovely Wifey isn’t too pleased with that since she wants to put her Mini Cooper in there but…oh well. As soon as I get it running I’ll give up that side of the garage to her.
I finished cleaning out and de-rusting the rear halves of the floorboards and the center tunnel. I wire brushed everything all shiny, applied rust converter and let it dry. A few layers of truck bed liner later and it’s ready to paint...I also bought some sheet metal to replace the rusted out metal in the kick panels and floorboards so methinks some welding is in my future this weekend.
I’ll be ripping out the galvanized sheet metal and home fiberglass insulation the DPO (dumbass previous owner) put down on the driver’s side floorboards to see what I’m actually dealing with in there. It won’t be good whatever it is.
I heard back from the guy from whom I bought the car regarding my “concerns” about the condition of the car being much worse than he led me to believe in his Ebay listing. His response was basically “oops, oh well.” It is probably a stretch to say that he lied about the condition of the car. However, it is also probably fair to say that he knew more about the actual condition of the vehicle than he said he did. I’d like to believe him, he seemed like a nice guy, but either he lied or just ignored what he knew was there to deceive himself about the car’s condition. Either way, I paid.
I found out that you need to either buy or make a special tool to replace the door waist seals (between the door and the side windows)…Of course you do.
Getting together a parts order for the Spit. It won’t be anything more than the bare essentials such as plug wires, hoses, belts, etc. I’ll use some of the parts I bought for the MGB (rear view bullet mirrors, cockpit insulation, sound system, etc) whenever possible as long as it won’t interfere with my immediate work on that car.
(UPDATE: just placed the parts order, this one through Victoria British. I’m also about to get four tires for the car, probably on ebay. Oh, I need a battery too…so much for getting this thing on the road for cheap.)
My Wifey is leaving for Alaska on the 29th for 25 days to do research so I’ll be able to get a lot done on the cars and the house…I’d rather have her here and work more slowly but such is life.
June 23, 2010
6-22-2010
I got the Spit started and it was running today for about 30 seconds…and by that I mean that I started it 15 times and it ran for 2 seconds each time so cumulatively…30 seconds.
I’m pretty sure the problem is the carb…mucho screwed it is. When I pulled it off and opened it up on Monday, I found the inside was completely gummed up with varnish and clogged. I cleaned it with carb cleaning spray and put it back together. The needle looks like shit so I’m guessing it will have to be replaced along with the needle seat.
When I hooked up the battery and tried to start it yesterday there was nothing, zip, nada, no power to anything. I assumed it was the starter solenoid/relay which is located on the firewall and looks as old as dirt. I was wrong. I tried to charge the (supposedly good) battery that came with the car and the charger kept kicking off. I checked the voltage and the meter read 3 volts. I put the old Corvette battery I had into the car and viola’…power.
I put the charger on it and tried to start it…no joy but it turns over and tried to run so that is a good sign.
I ordered a carb rebuild kit yesterday from Moss Motors along with the starter solenoid (which I actually don’t need) and a Haynes manual…which I definitely WILL need.
I sanded some on the trunk lid and primed and painted it with a spray can. It’s blue and looks like a rattle can paint job…but what did I expect. Clear coating it made it look semi-non-shitty.
I think I’ll clean out the other bay of the garage tonight and slide the Spit in there alongside the MG…gonna have to stack stuff on top of stuff on top of more stuff but I am that good :)
I’ll probably pull the bumpers off tomorrow and continue with the body work and cutting out of rusted metal until the parts order gets here. I will be putting chrome bumpers on the car since the rubber bumper monstrosities on there now are just plain hideous.
June 21, 2010
6-21-2010
Well the Spit is home…and now it won’t leave!
Kevin and I brought it back from Cherryville, NC on Saturday and my lovely wifey seems to have taken a hankering to it (That’s my Southern saying for today) The kids are also fighting over who gets the car.
My Starbuck (wife) and I tore the interior out and then, while she stripped the seats, I did an assessment of the condition of the car.
Not good is a huge understatement.
There is a LOT more wrong with this car than I thought.
Bad; the driver floorboard has the most Mickey-Mouse repair I’ve ever seen. Home fiberglass insulation on the floorboard with a galvanized piece of sheet metal riveted to the rotten floorboard with bondo smeared over the underside.
The rear of the same side has steel welded over the top of the floorboard with wires running under the metal so they can’t be accessed! The underside was coated with fiberglass instead of bondo.
Worse; the steel on the sides of the footwells where they meet the floorboards is rotted away on both sides. Luckily this car is not a unit-body or it would have collapsed by now. I’m going to have to cut that all away and weld in new steel.
The carpet is reusable but the seats are completely shot. We bought cheapo seat covers and I’ll be cutting out foam rubber with an electric carving knife to rebuild the seats.
I bought new hardboard to cut out the interior and door panels and we picked a dark synthetic material to cover the panels in.
I stripped out the trunk, cleaned and primed it and painted it the Navy blue that the rest of the car will be. After we got the interior out I also got most of the rust off the driver’s floorboards and put down rust converter. I’m going to start cutting metal this weekend and we’ll find out how go of a novice welder I am.
I found out that many parts for this car are simply not available. I had to manufacture new seals for the rear lights and backup light housings out of sheet cork. Judging by the limited number of replacement parts available, I think I’m going to wind up having to improvise a lot with this car.


June 16, 2010
Deja vue all over again...entry one
6-15-2010
So here I go again!
I am now the proud owner of a 1979 Triumph Spitfire. Why? Because I was dumb enough to bid on one on eBay thinking “I bid such a low amount that surely I will get outbid and lose the auction…” the last time I did that I bid $1.00 on a junky, rusted, nearly-worthless MGB bumper with a $40.00 shipping charge…I won that too!
I’m currently engaged in a full restoration of a 1974 MGB roadster. I wanted to get it done by this summer but that looks unlikely now unless I really rush it and I do NOT want to do that. I bought the Spit so I could have a fun little British
roadster to drive around while I restore the B.
I don’t plan on doing much to this one…the bare minimum actually. But when the B is finished, I can see doing a rolling restoration on this one.
The car seems to be in pretty good shape considering that it is 30+ years old, that I only paid $1300.00 for it and that it is a Triumph. It supposedly only has 52,000 original miles on it…well we’ll see.
I haven’t even seen the car yet and I even won’t be picking it up until this Saturday in a town called Cherryville, NC, about 75 miles away from my home in Winston-Salem, NC. My MG buddy Kevin is getting his flatbed trailer and company pickup and we’re hauling it back here. It isn’t currently running so driving it back is not an option. And even if it was, I’m not sure I’d want to do battle on interstates 40 and 85 around Charlotte, NC in a car that I’ve never driven, don’t know and that is not much bigger than a go-kart! Spitfires make my MG look like a giant SUV in comparison!

Here is what the ebay listing said about the car:
The car set up for over a year. The carb has gummed up and the vacuum lines have split. The car will crank with quick start shot in the carb, but it won't stay running because the carb won't jet fuel. Fuel pump is pushing gas to the carb.
Now on to the car; new stuff includes alternator,
recent battery,
fuel tank sensor,
shocks,
the top's in pretty good shape as are the tires.
The driver’s floor was replaced, and overall there's not much rust.
The paint job was a budget shop type job, so it shows it.
Seats covers are cloth and threadbare, overall the electrical system was sound when the car was being driven. This is a plus if you've owed a Spitfire.
Included are a new set of Monroe Air Tune Corvette rear shocks. You put these on and reset the suspension, the car rides better, passenger capacity goes up and the stance of the rear tires changes. Another Spitfire oddity is the rear suspension on all models. The rear wheels toe in up top, the independent rear suspension makes for great handling, but some drawbacks. I set up the '74 Spit I used to own with these type shocks and it really worked well. And to all the Spitfire purists out there who are furious right now, please don't email me about the horrible thing I just said about the Spitfire and it amazing suspension.
The shocks are in a box in the trunk, which isn't rusted out by the way.
 This car will make a great daily driver, and since it's sound overall, a candidate for restoration for a show car. I've seen basket cases go for more money than I even thought, this car is a much better start for a project. A few vacuum lines and a carb re-build and you have a driver. If I wasn't facing another surgery and feeling the financial impact of seven surgeries in eight years, this vehicle would be running, and not for sale.
About the auction, when you win, I require $500.00 as a deposit within 24 hours via PayPal. The balance due when you pick it up, which must be within five days of your win. The balance due should be in a certified form of check, or I will even take cash, with proper ID. Ebayers this is a Continential US auction only, I won't ship to far off exotic lands, even if your uncle owns a trans-atlantic shipping firm and you'll handle customs. I'll try to answer your questions, if I don't reply within 30 seconds, don't be upset with me, I'm not a well man. You are purchasing an old car made over seas, its not a show car, it ran great, it needs some TLC, and I really hate I'm having to sell her. The car is As-Is, no refunds, no warranty expressed or implied, you bought it, its yours, etc. If your not afraid to turn wrenches and want an easy project that you can drive and make money on, want to build a show car, or have a good mechanic and some extra cash to play with, here is your new toy. Thanks and happy ebay to all.
Well now you know everything I know about the car. I’ll, of course, post more pics and info as it comes in. Here I go again

So here I go again!
I am now the proud owner of a 1979 Triumph Spitfire. Why? Because I was dumb enough to bid on one on eBay thinking “I bid such a low amount that surely I will get outbid and lose the auction…” the last time I did that I bid $1.00 on a junky, rusted, nearly-worthless MGB bumper with a $40.00 shipping charge…I won that too!
I’m currently engaged in a full restoration of a 1974 MGB roadster. I wanted to get it done by this summer but that looks unlikely now unless I really rush it and I do NOT want to do that. I
 bought the Spit so I could have a fun little British
roadster to drive around while I restore the B.
I don’t plan on doing much to this one…the bare minimum actually. But when the B is finished, I can see doing a rolling restoration on this one.
The car seems to be in pretty good shape considering that it is 30+ years old, that I only paid $1300.00 for it and that it is a Triumph. It supposedly only has 52,000 original miles on it…well we’ll see.
I haven’t even seen the car yet and I even won’t be picking it up until this Saturday in a town called Cherryville, NC, about 75 miles away from my home in Winston-Salem, NC. My MG buddy Kevin is getting his flatbed trailer and company pickup and we’re hauling it back here. It isn’t currently running so driving it back is not an option. And even if it was, I’m not sure I’d want to do battle on interstates 40 and 85 around Charlotte, NC in a car that I’ve never driven, don’t know and that is not much bigger than a go-kart! Spitfires make my MG look like a giant SUV in comparison!

Here is what the ebay listing said about the car:
The car set up for over a year. The carb has gummed up and the vacuum lines have split. The car will crank with quick start shot in the carb, but it won't stay running because the carb won't jet fuel. Fuel pump is pushing gas to the carb.
Now on to the car; new stuff includes alternator,
recent battery,
fuel tank sensor,
shocks,
the top's in pretty good shape as are the tires.
The driver’s floor was replaced, and overall there's not much rust.
The paint job was a budget shop type job, so it shows it.
Seats covers are cloth and threadbare, overall the electrical system was sound when the car was being driven. This is a plus if you've owed a Spitfire.
Included are a new set of Monroe Air Tune Corvette rear shocks. You put these on and reset the suspension, the car rides better, passenger capacity goes up and the stance of the rear tires changes. Another Spitfire oddity is the rear suspension on all models. The rear wheels toe in up top, the independent rear suspension makes for great handling, but some drawbacks. I set up the '74 Spit I used to own with these type shocks and it really worked well. And to all the Spitfire purists out there who are furious right now, please don't email me about the horrible thing I just said about the Spitfire and it amazing suspension.
The shocks are in a box in the trunk, which isn't rusted out by the way.
 This car will make a great daily driver, and since it's sound overall, a candidate for restoration for a show car. I've seen basket cases go for more money than I even thought, this car is a much better start for a project. A few vacuum lines and a carb re-build and you have a driver. If I wasn't facing another surgery and feeling the financial impact of seven surgeries in eight years, this vehicle would be running, and not for sale.
About the auction, when you win, I require $500.00 as a deposit within 24 hours via PayPal. The balance due when you pick it up, which must be within five days of your win. The balance due should be in a certified form of check, or I will even take cash, with proper ID. Ebayers this is a Continential US auction only, I won't ship to far off exotic lands, even if your uncle owns a trans-atlantic shipping firm and you'll handle customs. I'll try to answer your questions, if I don't reply within 30 seconds, don't be upset with me, I'm not a well man. You are purchasing an old car made over seas, its not a show car, it ran great, it needs some TLC, and I really hate I'm having to sell her. The car is As-Is, no refunds, no warranty expressed or implied, you bought it, its yours, etc. If your not afraid to turn wrenches and want an easy project that you can drive and make money on, want to build a show car, or have a good mechanic and some extra cash to play with, here is your new toy. Thanks and happy ebay to all.

Well now you know everything I know about the car. I’ll, of course, post more pics and info as it comes in. Here I go again
Subscribe to:
Posts (Atom)